¶ Game Tutorial: The Facility Map
In this tutorial, we’ll go over the map layout of SCP: Secret Laboratory.
For new players, the game’s maps can feel confusing at first. That’s because maps are randomly generated each round, making it hard to know where you are. However, experienced players often seem to navigate with ease.
The reason is simple: while the map layout is randomized, the zones are fixed in size and theme. By recognizing these zones, you can quickly orient yourself and find the way to escape—or stop others from escaping.
¶ Zone Overview
The facility is divided into four major zones:
- Light Containment Zone (LCZ)
- Heavy Containment Zone (HCZ)
- Entrance Zone (EZ)
- Surface Zone
Each has distinct visual features that make it recognizable.
| Zone | Location | Key Features |
|---|---|---|
| Surface Zone | Outside the facility | Open sky visible |
| Entrance Zone | First underground zone | White–orange wall stripes |
| Heavy Containment Zone | Between EZ and LCZ | Metal floors, dark walls |
| Light Containment Zone | Deepest zone | White tiles, high ceilings |
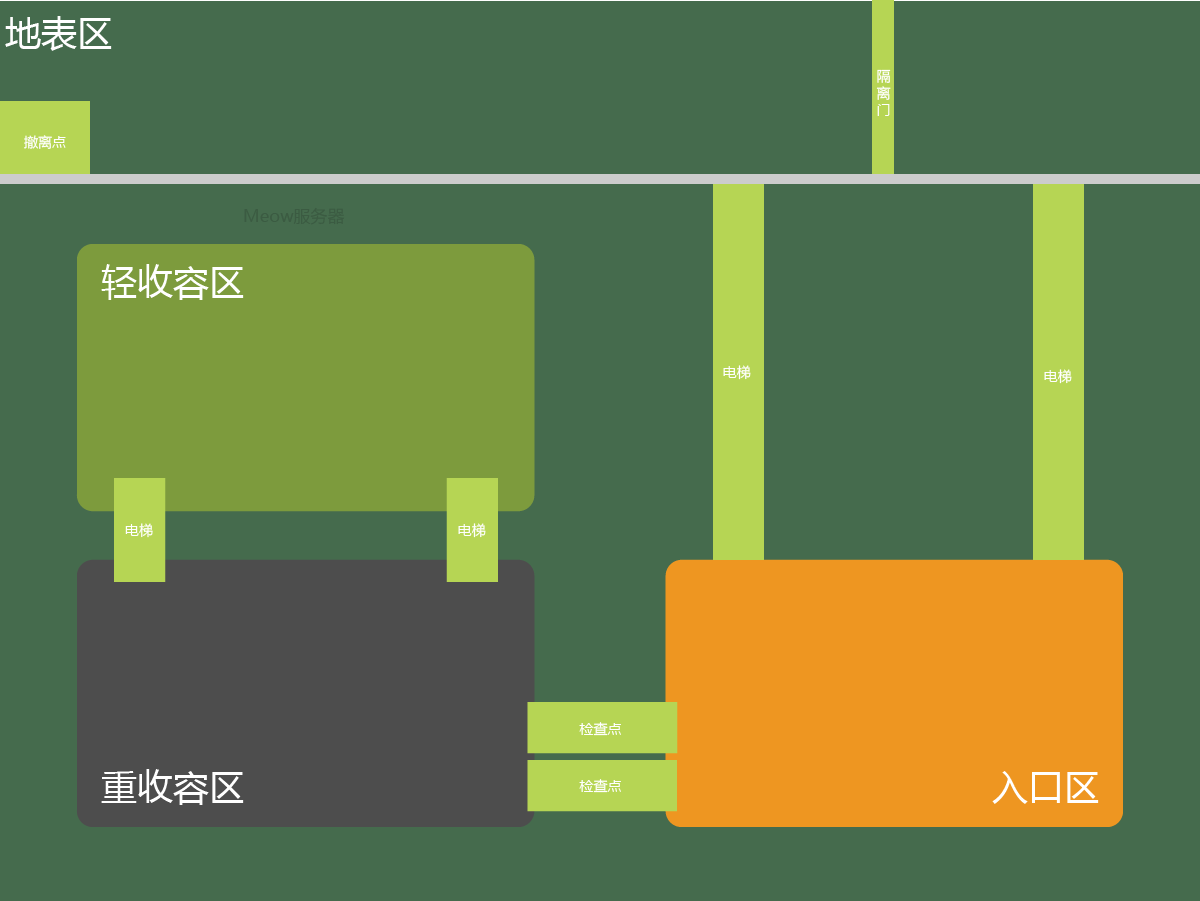
¶ Light Containment Zone (LCZ)
- Deepest part of the facility.
- Contains low-risk SCPs.
- Starting point for Scientists and D-Class Personnel.
- Rich in supplies and unique items.

Example Rooms (randomized):
- Former SCP-173 Containment – Now abandoned but still holds leftover supplies.
- Airlock – A special hallway where only one side of the doors can be open at once.
- SCP-914 Chamber – Houses the Clockworks Machine, which upgrades or downgrades items and keycards.
¶ Heavy Containment Zone (HCZ)
- Connects Entrance Zone and LCZ.
- Houses high-risk SCPs.
- Rich in weapons and advanced equipment.
- ⚠️ Considered one of the most dangerous areas throughout the round.

Example Rooms (randomized):
- Server Rooms & Test Labs – No major gameplay use but often hold loot or generators.
- MicroHID Storage – Contains the experimental MicroHID weapon.
- Tesla Gates – Security systems that discharge electricity. Must be crossed while inactive.
- Alpha Warhead Silo – Accessible via elevator; controls for enabling/disabling the warhead are found here.
- SCP-173 & SCP-049 Containment – Accessible via elevators; often hold useful supplies.
¶ Entrance Zone (EZ)
- First underground zone after entering the facility.
- Contains no SCP spawns.
- Limited supplies—usually medical kits and low-level keycards.
- Dangerous for humans since it often becomes contested ground later in the game.

Example Rooms (randomized):
- Broadcast Room – Allows global announcements across the facility.
- Main Gate Elevators – Require a high-level keycard with Gate Access to operate.
¶ Surface Zone
- Outside the facility, above ground.
- Spawn point for MTF Nine-Tailed Fox and Chaos Insurgency.
- Contains no supplies.
- Human-friendly: most SCPs lose much of their threat potential here.
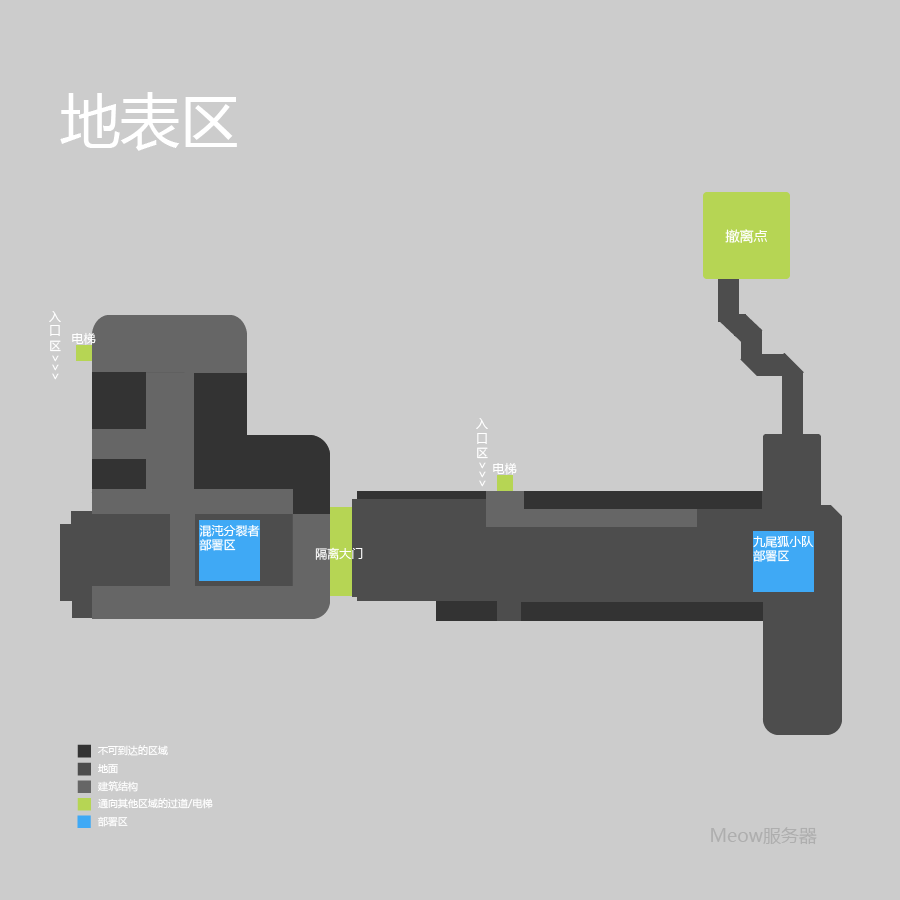
Notes:
- This zone is not randomized—its layout is fixed.
- The left side of the main gate is known as Gate A, and the right side as Gate B.
- The Warhead Control Room (for detonating the Alpha Warhead) is located near Gate A, close to Chaos spawn.
¶ Conclusion
By learning to recognize the zone divisions rather than memorizing exact layouts, you’ll quickly improve your navigation skills, making it easier to escape or pursue your objectives.
👉 Next Tutorial: SCP Tutorial or [Advanced Human Guide]